Capturing the Whisper of Venetian Romance
Decorative Plaster's Dance of Flowers and Curves
Walid Ghali
10/15/20233 min read
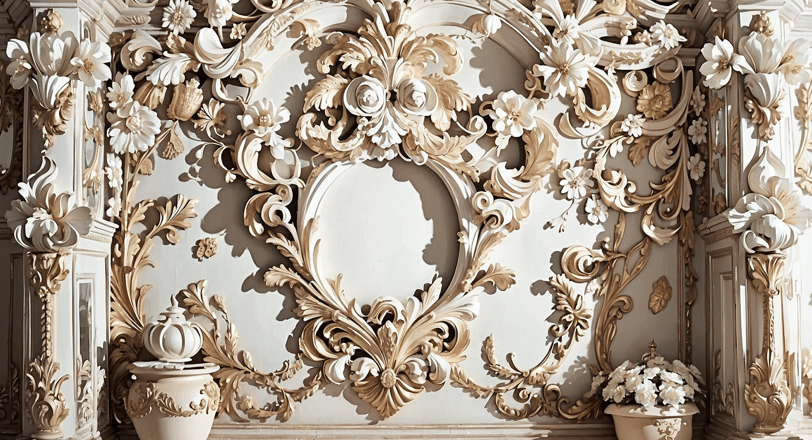
Have you ever dreamed of adorning your walls with a touch of Venetian romance? Imagine the walls of your home whispering tales of timeless elegance and love as you gaze upon their exquisite, handcrafted beauty. In this enchanting tutorial, we invite you to embark on a journey that will leave you breathless with the sheer beauty of it all.
Step into a world where gypsum plaster takes on a life of its own, allowing you to shape curves and craft flowers with a delicate randomness that mirrors the capricious nature of love. As you create, it's not just about instructions; it's about dancing with your walls, gently and lovingly guiding the plaster as it forms the curves of desire and the petals of passion.
Let your heart and hands intertwine as you shape the curves that echo the flowing canals of Venice, each stroke whispering sweet nothings to your soul. Delicately sculpt the flowers that bloom with every tender touch, like a heartfelt confession of love.
Join us in this romantic journey, and let the walls of your home become a testament to your love for beauty, art, and the enchanting elegance of Venetian romance. This is more than just a tutorial; it's an embrace of the artistry and love that flows through your fingertips. Experience the magic, and let your walls sing with the echoes of love and grace, all in the name of timeless romance.
Materials You'll Need:
Gypsum Plaster: Purchase gypsum plaster (plaster of Paris) from your local hardware store.
White Paint: You'll need white paint to achieve the desired color. Acrylic paint works well.
Water: To mix with the plaster.
Mixing Tools: Prepare a mixing container and use a mixing paddle or spatula.
Protective Gear: Consider using gloves to protect your hands.
Paintbrushes: For touch-ups and painting, if desired.
Step 1: Measure and Mix
Measure the amount of gypsum plaster you'll need. A starting point is to use equal parts of plaster and water, but you can adjust as needed.
Add white paint to the mixture to achieve your desired color.
Slowly pour water into the plaster mixture while continuously stirring to avoid lumps.
Step 2: Texture Adjustment
Adjust the texture by adding more plaster if the mixture is too runny or more water if it's too thick. Continue mixing until you reach the right consistency.
Step 3: Application
Once your plaster mixture is ready, apply it to the wall.
Use your hands or tools to shape the decorative floral and leaf patterns as desired. The mixture should be thick enough not to stick to your hands.
Step 4: Allow to Dry
Drying times vary. Thin layers may dry in a few hours, while thick, hand-sculpted designs can take several days. Be patient and allow it to dry completely.
In general, decorative plaster mixtures may take anywhere from several hours to several days to fully dry. Thicker applications will naturally take longer to dry than thin ones. Here are some approximate drying times for reference:
Thin Layers: If you're applying a thin layer of decorative plaster for a subtle texture, it may dry in a matter of hours or overnight.
Moderate Thickness: For decorative elements with a moderate thickness, such as hand-sculpted flowers and leaves, drying may take 24 to 48 hours or even longer.
Thicker Applications: If you're creating highly detailed and thick decorative elements, it can take several days to a week or more to fully dry, especially in humid conditions.
Factors like ventilation and temperature also play a role in the drying process. Adequate ventilation can help accelerate drying. In contrast, high humidity can slow down the drying time.
It's essential to be patient and allow the plaster to dry thoroughly before proceeding with any additional finishing or painting. You can often tell that the plaster is fully dry when it becomes hard, and it no longer feels cool or damp to the touch.
To get a more precise estimate for drying time, you can refer to the manufacturer's instructions on the product you're using, as different brands and types of decorative plaster may have varying drying times and recommendations for optimal conditions.
Step 5: Finishing
Once dry, you can sand any rough areas and paint the decorations to your liking.
Conclusion:
Creating your own decorative plaster wall art allows you to add a personal touch to your space. Experiment with different textures and designs to achieve the look you desire. Whether it's delicate flowers or intricate leaves, this DIY project can transform your walls into a work of art. Enjoy your creative journey!